Mac App Store Link: https://apps.apple.com/us/app/eztimelapse/id6467549138
Simple But Powerful Deflicker Effect In EzTimelapse
Mac App Store Link: https://apps.apple.com/us/app/eztimelapse/id6467549138
How To Make a Time Lapse Video of Plants Growing?
step 1: Choose Your Plant
Knowing your plant’s behaviour can help you gauge how big or fast the movements will be. This allows you to plan for the best interval timing for achieving a smooth video output, while ensuring that your subject stays within the frame. It also allows you to pick out the angle that best features your subject. waterlilies usually bloom from mid-morning to mid-afternoon, and its blooming time is about 2-4 hours.step 2:Camera Equipment
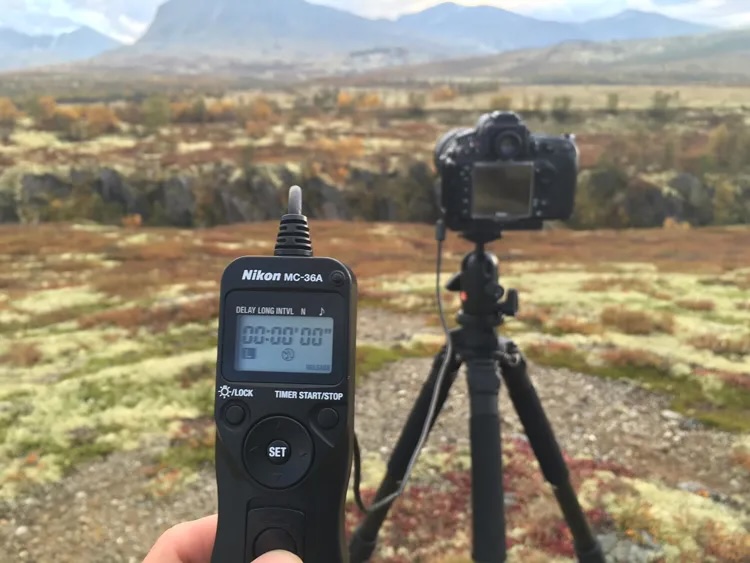
- We need to mount camera in a way that ensures it won’t move. We use a sturdy tripod.
- We need AC Power Supply: Not moving the camera means you can’t change the battery. You will need to get yourself a dedicated power supply for your camera.
- You can’t be touching the camera at all during a time-lapse recording. Even triggering the shutter for the first time can cause unwanted shake or motion blur. The simplest way to overcome this is to use a remote shutter release – a small IR or Bluetooth device with a button like a remote control. If your camera is relatively new, Most digital DSLR and mirrorless cameras feature a built-in intervalometer. This allows you to take a certain number of images at a specific frame interval.
step 3:Camera Setting
- We need Calculate Time Lapse Intervals:if the flower blooming time is 3-4 hours, an interval of between 10 and 20 seconds is best.
- Start shooting
step 4:Edit your Time-Lapse Photography
You need to find some software that has the ability to make time-lapses from photos.
EZTimelapse is a mac Application for converting images into time-lapsed video and removing time-lapse flicker. User-friendly interface makes processing simple for amateurs and professionals. Supports workflow that imports JPEG images and output MP4 video/JPEG images.
EZTimelapse can also automatically de-flicker the time-lapse sequence.
OK! you’re done!
Which is the best software for editing time lapse videos?
Want a software to convert images into time-lapsed video?
Want a software for deflickering timelapse ?
You just need:EzTimelapse
Mac App Store Link: https://apps.apple.com/us/app/eztimelapse/id6467549138
How to Create Timelapse Video?

Creating a time-lapse video involves capturing a series of photos at regular intervals and then compiling them into a video format. Here’s a step-by-step guide to creating a time-lapse video:
Equipment and Preparation:
Camera: Use a digital camera with manual settings or a smartphone with a time-lapse feature.
Tripod: Ensure your camera is stable to avoid shaky footage.
Power: Make sure your camera has a constant power source to prevent it from running out of battery during the shoot.
Frame the Shot: Choose a compelling subject and frame your shot. Consider the composition and the movement within the frame.
Camera Settings:
How to Fix Flicker Quickly and Easily, EzTimelapse Deflicker Tool Tutorial
Mac App Store Link: https://apps.apple.com/us/app/eztimelapse/id6467549138
What is Timelapse Photography?
Time-lapse photography is a technique in which a series of photos are taken at regular intervals over a period of time and then played back at a faster speed, creating the illusion of time passing quickly. This technique is often used to capture slow processes that are not easily noticeable in real-time, such as the movement of clouds, the blooming of flowers, or the construction of buildings.
To create a time-lapse video, a camera is set up on a stable surface or a tripod, and it captures images at predefined intervals, such as every few seconds or minutes. These images are then compiled into a video using specialized software. The interval between shots and the total number of frames captured determine the speed at which the final time-lapse video will play.
Time-lapse photography allows viewers to witness events that unfold over a long period of time in just a few minutes or seconds, providing a unique perspective on the passage of time. It is commonly used in filmmaking, documentary production, scientific research, and creative photography projects.
How to Deflicker a Timelapse
Deflickering a time-lapse video involves reducing or eliminating the variations in brightness or exposure that can occur between individual frames, resulting in a flickering effect. This can happen due to changes in lighting conditions, automatic exposure adjustments, or other factors. Here’s how you can deflicker a time-lapse video using software like EzTimelapse:
- Import Your Time-Lapse Sequence:
- Open EzTimelapse and import your time-lapse photo sequence into the Photo-List on left.
- Enable Deflicker:
- Switch to enable Deflicker module.
How to make a timelapse video on iMovie
Creating a time-lapse video with iMovie is a straightforward process. Here’s a step-by-step guide to help you make a time-lapse using iMovie:
Step 1: Capture the Time-Lapse Photos/Videos
First, you need to capture a series of photos or videos to create the time-lapse effect. You can use a dedicated camera or a smartphone to do this. Make sure the camera is stable and the interval between shots is consistent for a smooth time-lapse sequence.
Step 2: Import Media into iMovie
- Open iMovie: Launch iMovie on your Mac.
- Create a New Project:
Create a movie with an image sequence in QuickTime Player on Mac
You can convert an image sequence——a set of sequentially numbered or named images—to a movie or time-lapse video in QuickTime Player.
In the QuickTime Player app on your Mac, choose File > Open Image Sequence.
Select the image sequence folder in the Finder, then click “Choose media.”
You can choose to select specific images and not the entire folder.
- Set the movie quality.
To keep or change the quality of the image sequence, choose any of the following options in the image sequence pop-up menu: