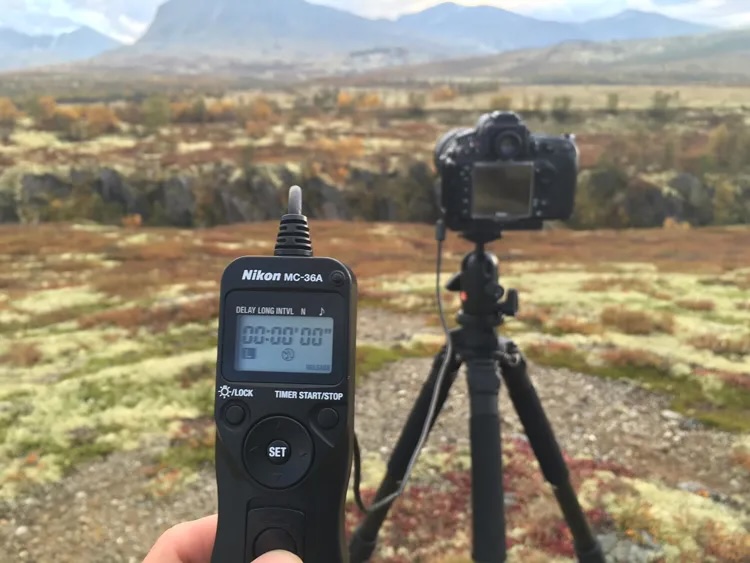
Creating a time-lapse video involves capturing a series of photos at regular intervals and then compiling them into a video format. Here’s a step-by-step guide to creating a time-lapse video:
Equipment and Preparation:
Camera: Use a digital camera with manual settings or a smartphone with a time-lapse feature.
Tripod: Ensure your camera is stable to avoid shaky footage.
Power: Make sure your camera has a constant power source to prevent it from running out of battery during the shoot.
Frame the Shot: Choose a compelling subject and frame your shot. Consider the composition and the movement within the frame.
Camera Settings:
Manual Mode: Use manual mode to control exposure settings (aperture, shutter speed, ISO) to maintain consistent lighting throughout the time-lapse.
Focus: Set the focus to manual to prevent the camera from refocusing between shots.
Interval: Set the interval between shots. This could be a few seconds to a few minutes, depending on the speed you want for your time-lapse.
Number of Shots: Determine how many photos you need to capture. This depends on the total duration of the event and the frame rate you want for the final video.
Capture the Photos:
Start Shooting: Begin the time-lapse sequence and let the camera capture photos at the set intervals.
Monitor: Keep an eye on the camera to ensure it’s functioning properly and the composition remains unchanged.
Post-Processing:
Transfer Photos: Transfer the captured photos to your computer.
Editing: Use photo editing software (such as Adobe Lightroom) to enhance the photos if necessary.
Batch Editing: If required, you can apply edits to all photos simultaneously to maintain consistency.
Create the Time-Lapse Video:
Choose a Video Editing Software: Use video editing software like EzTimelapse, Adobe Premiere Pro, Final Cut Pro, iMovie (for Mac), or even free options like DaVinci Resolve or Shotcut.
Import Photos: Import all the edited photos into the video editing software.
Set Frame Duration: Adjust the duration each photo is displayed to create the desired speed. For example, if your video will be 30 frames per second (fps) and you captured one photo every 5 seconds, set each photo to be displayed for 1/30th of a second.
Add Music (Optional): If desired, you can add background music or narration to the video.
Export: Once you’re satisfied with the video, export it in your preferred format and resolution.
Share Your Time-Lapse:
Save and Share: Save the final video on your computer and share it on social media platforms, video sharing websites, or other platforms where you want to showcase your work.
Remember, creating a compelling time-lapse video takes practice and experimentation. Don’t be afraid to try different intervals, framing, and editing techniques to achieve the desired effect.